 Hey everyone! So it's obviously been far too long since my last post! Lots of family issues and moving. I would like to please ask everyone to keep Brent and his family in your prayers, due to his father passing away. That was the roughest part of this past month, but Brent seems to be doing alright, but its never easy losing someone you're close too. Especially so unexpectedly.
Also.. While we're on the subject of Brent, I am sooo happy to announce to you that Brent and I and ENGAGED! It was a Happy (early) Valentine's Day present to me. Pics of the ring will be posted as soon as I get it back. It's being re-sized and I should have it back on Valentine's day. :)
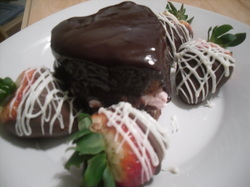
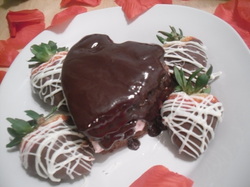
 Now... because of moving and all.. most of my baking supplies have been packed away for the last month. Now that we're starting (trying!) to get settled into the new place, I'm pulling it all back out! FINALLY! And since it's just in time for Valentine's day, I came up with something very special for you to make for that sweetie in your life! Nothing say's "I love you" more something handmade from the heart. <3 And (in my opinion) the most romantic food I can think of is chocolate covered strawberries. So.. here is the run down on this super sexy and delicious dessert. :)
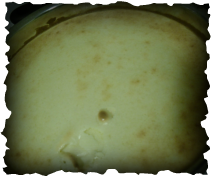
 - Soft, moist chocolate sponge cake
- Whipped filling, made with fresh strawberries and heavy cream.
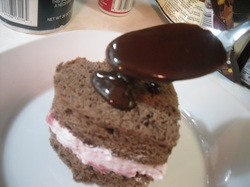
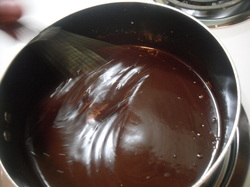
- Super simple, milk chocolate ganache that is perfectly smooth and delicious.
Doesn't that sound perfect? It is. I hope you guys enjoy this, and I hope your sweetie enjoys this, as much as me and my fiance did. :D
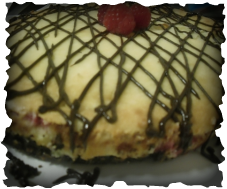
Chocolate Covered Strawberry Heart Cake
 Chocolate Sponge Cakeadapted from hereIngredients:8 egg whites 1/2 teaspoon cream of tartar 1/2 teaspoon salt 2/3 cup sugar 4 egg yolks 2 teaspoon vanilla 1/2 cup all-purpose flour 1/2 cup cocoa
|  Directions:
1. Preheat oven to 325
2. Line 2- 8 inch square pans with wax paper. Set aside.
3. Put egg whites, cream of tartar, and salt in a large mixing bowl and beat with an electric mixer until foamy.
4. Gradually add the sugar and beat until you have stiff peaks.
5. Beat in egg yolks and vanilla.
6. In a small bowl mix together the flour and cocoa. Add it to your egg and sugar mix and USE A SPATULA TO FOLD INTO MIX.
7. Spread evenly into the 2 prepared pans. Bake for 25-30 minutes, rotating halfway through bake time. (while baking you can make your filling )
8. As soon as you pull it from the oven, immediately take it out of the pans too cool.
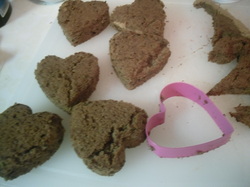
9. When completely cooled, use a heart shaped cookie cutter cut an even number of hearts from the cake.
|  Fresh Whipped Strawberry Filling
Ingredients:
2 cups fresh strawberries, chopped
1 Tbl cornstarch
1 Tbl sugar
1 cup heavy cream
another 1 Tbl sugar
1 tsp vanilla
|  Directions:
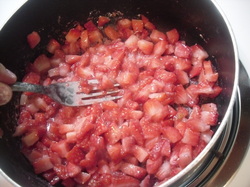
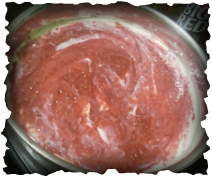
1. In a sauce pan, over medium heat, add the strawberries, cornstarch, and 1 Tbl sugar.
2. Use a fork to mash the ingredients together.
3. Bring to a simmer and let cook for 1 minute. Remove from heat and set aside to completely cool.
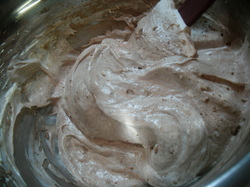
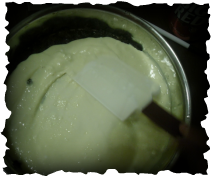
4. In a mixing bowl, use an electric mixer to beat the cream, 1 Tbl sugar, and vanilla until stiff peaks from.
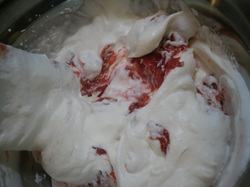
5. Add cooked strawberries to cream and use a spatula to fold it all together. Set aside.
|  Chocolate Ganache
1 cup heavy cream
9 oz. (2/3 of a 12 oz bag) of chocolate chips
1 tsp vanilla
|  Directions:
In a sauce pan over medium heat bring the cream to a simmer, whisking frequently to keep from scorching. When the cream simmers, add the chocolate chips and whisk together until smooth and melted. Let simmer for 1 minute, whisking frequently. Remove from heat and mix in vanilla. Let sit for 5 minutes before using.
| 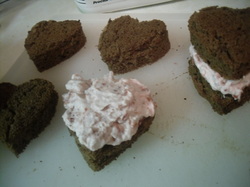 ASSEMBLY Take your delicious, chocolate hearts and make a sandwich with your strawberry filling. Top with your smooth chocolate ganache. Garnish with a chocolate covered strawberry, and enjoy a romantic evening with your sweetie. :) Or you know, if you happen to be single this Valentine's day that's ok too! Don't you think you deserve to show yourself a little love? Come on! Enjoy and indulge. <3 If you haven't already please go and 'like' my facebook page! It's a great way to keep with with new recipes, posts, and giveaways! You can also follow me on pinterest and pin all of my recipes to your boards to try later. If you have any questions or comments, please feel free to comment below, or contact me through email or my facebook page! I look forward to hearing from you!
 Hey guys! Happy Halloween!! How is everyone doing? I have been super busy, as always. Let me catch you up on a couple things. First of all... a couple weeks ago something pretty huge happened for me! The local bakery that I work at, Pinch of Sugar, started selling some of my homemade candies! Just peanut butter cups for now.. but I'm hoping that before Christmas I will be selling multiple kinds of candies there! I'm so excited about it. :) So if you're around town anytime soon, swing in and buy some of my handmade candies and a cupcake too! :) Also yesterday my roommates and I held our Halloween party! Soooo much fun! We had a some snacks.. ya know, some cupcakes, a cheese ball, spaghetti, lots of candy, and some awesome punch. Brent, the two Heather's, and I dressed as a mob family. Hopefully I'll get a pic of all of us up soon. :)
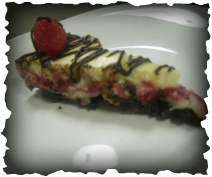
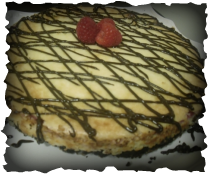 Anyways, enough about me and my life. Lets get to the real story here. CHEESECAKE. And not just any cheesecake. This cheese cake has a dark chocolate cookie crust, cream vanilla cheesecake with an out-of-this-world raspberry filling, and a dark chocolate drizzle on top. Yes. Yes it is as amazing as it sounds. YUMMMM... This is a 4 part recipe: crust, cheesecake, filling, drizzle. Lets get started shall we?:)
Dark Chocolate Raspberry Cheesecake
Preheat oven to 350. 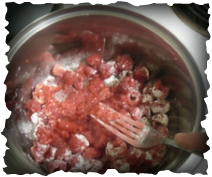 Filling
12 oz fresh raspberries (leave a couple aside for garnish if you'd like)
4 tsp corn starch
1 Tbl sugar
Directions:
In a sauce pan add all 3 ingredients and turn the the heat on medium to medium high. Use a for to smash strawberries into a sauce. Bring the filling to a boil for 1 minute, then remove from heat. Set aside.
|  Cheesecake
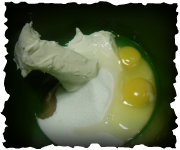
2 pkg cream cheese, room temp
2 eggs
1 cup sugar
1 tsp vanilla
Directions:
In a mixing bowl, add all ingredients, and mix until cream. Set aside.
|  Crust1 package dark chocolate cookies (I used the new Keebler's Dark Chocolate Fudge Striped Cookies) 5 Tbl butter, melted Directions: Crush all of the cookies. You can use a food processor if you like, I used a gallon sized zip lock bag and a rolling pin. Pour cookie crumbs into a bowl, add the melted butter and mix. Set aside.
Assembly  Use wet hands to press cookies into the bottom of a 9'' spring form pan.
 Pour half of cheesecake batter over crust. Spread out evenly.
 Spread raspberry filling evenly over cheesecake batter.
 Spread remaining cheesecake batter on top.
Bake for 45-50 minutes, rotating halfway through the bake time. When done, allow it to completely cool.
 To make the chocolate drizzle, melt 1/2 teaspoon of butter and 1/4 cup dark chocolate chips together. Put into a small zip lock bag and snip off a small part of the corner with scissors. Drizzle your pretty designs on top of your cheesecake and garnish with a few fresh raspberries. Have fun impressing everyone with this! Don't worry, they don't have to know how easy it is. lol
Have you checked out my facebook page yet? You should! Its a great way to keep up with blog posts and giveaways! Also follow my pinterest page! If you have any questions or comments please get feel free to message me, leave a comment below, or contact me through my facebook page! Happy Baking! And Happy Halloween!!
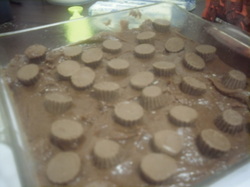
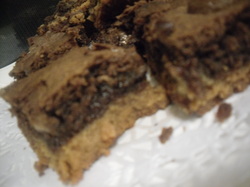 Hey everyone! I'm super excited to share this new recipe with you! It's a double layer dessert bar, the bottom layer is a simple peanut butter cookie, and the top is a fudgy brownie. And the best part, PEANUT BUTTER CUPS are all of this dessert! Soooo good. I find that the newer Mini Reese's cups work the best in this recipe. :)
Preheat oven to 325. Spray a 9'' pan with baking spray and set aside. 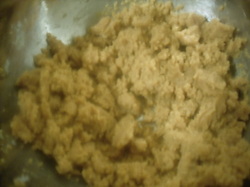 Bottom layer: PB cookie
Ingredients: 1 cup creamy peanut butter
1 cup sugar
1 egg
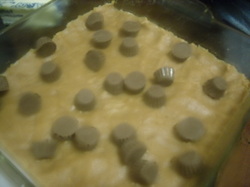 Directions: In a mixing bowl, mix the sugar and egg together. Then add the peanut butter. Mix until it forms a dough. Press dough into the bottom of the prepared baking dish. Sprinkle half of the package of the Mini Reese's Cups over the cookie dough. Set aside.
|  Top layer: Brownie
Ingredients:
1 stick unsalted butter, melted
1 cup flour
2 eggs
1 cup sugar
1/4 cup unsweetened cocoa
1/2 tsp vanilla
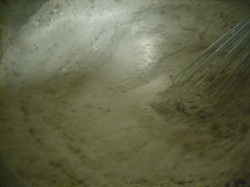
 In a mixing bowl, use a whisk to mix the flour, sugar, and cocoa. Add butter, eggs, and vanilla. Mix well.
|  Using a spatula, spread the brownie batter over the cookie dough and Reese's cups. Sprinkle the remaining Mini Reese's Cups over the batter. Bake for 30-35 minutes, rotating halfway through the bake time. Make sure its done in the middle. Let cool about 10 minutes before cutting into em. Could possibly be super delicious with ice cream. Yes. That sounds pretty awesome. :) Enjoy everyone!
Have you 'liked' my facebook page yet? It's a great way to stay updated on my posts and future giveaways. Tell your friends about my page too! Once I get 100 likes, there will be another giveaway! Also feel free to follow me on Pinterest! I pin all of my recipes, they would go excellent on your food board. I'm pretty sure everyone has one. lol If you have any comments or questions please comment below, message me, or get ahold of me through my facebook page! I love hearing from you guys! Happy Baking! :D -Jenni
 Hey everyone! Well it's Monday again. I love Mondays. :) However today I am down home (which is really only about an hour from where I reside). I'm babysitting my darling niece, Emily, all day while my mom spends time dealing with family matters. Speaking of which, my Grandpa Lloyd is not doing well and doesn't have much time left with us. So please keep my family in your thoughts and prayers! I will try to keep everyone updated on the matter. On a lighter note, I turn the big 2-4 on Wednesday! I'm really excited. I'm off work for the whole day and my darling Brent is taking me to get my nails done, and my friends from work, Ashley and Brian are planning a party for me at a local pub later that night. I absolutely can not wait. :) Anyways.. like I said, I have been down at my parents house all day with a soon-to-be 3 year old. So I've done some cleaning and of course some BAKING. :) One of the things I love about baking at my parents house is my mothers extensive collection of Tupperware. I love using products! If you haven't checked out her website, you should take a look! The downfall to doing this at my parents house.. I don't have my fancy utensils or platters. So yes, I am serving this cake on a cookie sheet lined with foil. Deal with it. lol
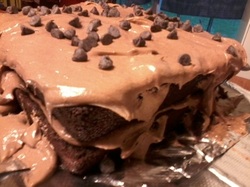
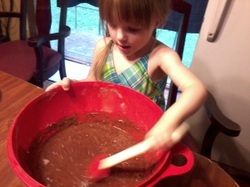 So little miss Emily let me help her make this cake... (the talented toddler she is. lol) and let me tell you... it is soooooo good! Super moist and full of chocolate! And the icing isn't heavy at all.. it's more like whipped icing. This is where I adapted the cake recipe from.
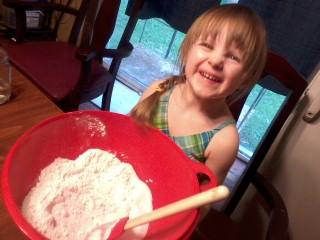 She looks kinda angry... but she's saying "CHEESE!" and laughing at the same time. lol 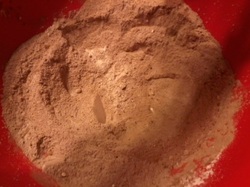 Double Chocolate Cake
2 cups flour
2 cups sugar
3/4 cup cocoa, unsweetened
2 tsp baking soda
1 tsp baking powder
1/2 teaspoon salt
2 eggs
1 cup cold brewed coffee
1 cup +2 Tbl of buttermilk
1/2 cup vegetable oil
Chocolate Chips
|  Directions:
Preheat oven to 350. Use parchment paper or baking spray on a 9x13, or (I used) 2- 8'' square pans.
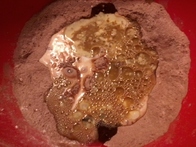
In a large mixing bowl, combine all dry ingredients. Make a well in the middle of the mix. and add all of the remaining ingredients except the chocolate chips. I hand mixed it so I wouldn't over mix.
Pour batter into pans. Sprinkle chocolate chips over the batter.
If making a 9x13 cake, bake for 35-40 minutes. For smaller cakes bake for 20-25 minutes. Rotate halfway through baking. Let cool. :)
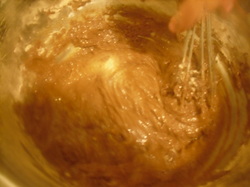
|  The icing I made for this cake is soooo good. Very light and fluffy. This is the recipe I used for the icing. I added about 1 cup of cocoa to make it chocolate. The recipe I adapted from asks you to use a stand mixer.. however I could not find one here (I'm sure it's around here somewhere! lol) So I used the hand mixer. It worked just fine, but took a lot longer and was a lot more work than I had hoped for. However, if you taste it... its totally worth it. This is an excellent recipe, and I will probably used it again. :) I just frosted it up and sprinkled more chocolate chips on top. Delicious! I hope you guys get to try this recipe, and enjoy it as much as I did! If you haven't already, please like my facebook page. I'm getting more and more likes and I'm loving it! I'm thinking once I get to 100, another giveaway. What do ya think? :) Also feel free to follow me on pinterest! If you have any comments or questions, please feel free to comment below, send me a message, or get ahold of me through my facebook page.
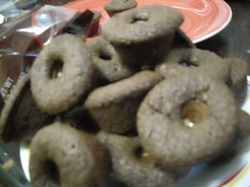 Hello to everyone! Man did I have a busy weekend! Check out the cakes I made! However, now I am home.. and after sleeping for almost 12 hours, I wake up and want cookies, lol. So I look through my books and find nothing in particular that perks my interest. I want chocolate and caramel goodness. The result I have come up with: Chocolate Rolo Cookies. So.Good. And easy!
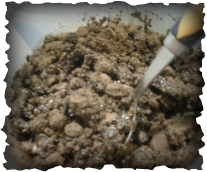
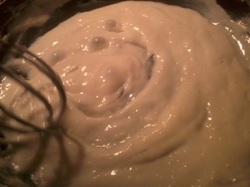
Chocolate Rolo Cookies 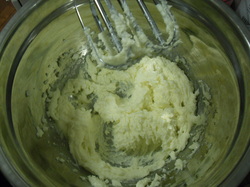 Creamed mixture, before adding the dry ingredients INGREDIENTS
6 Tbl. butter, room temp
1 cup sugar
1 egg
1 cup flour
1/3 cup cocoa, unsweetened
1/4 tsp baking soda
1/4 tsp salt
1/4 cup water
1 tsp vanilla
 DIRECTIONS
1. Preheat oven to 350. Use a cooking spray to coat a mini muffin pan.
2. Using mixer, cream the butter and sugar together until smooth.
3. Add egg and mix.
4. In separate bowl blend the flour, cocoa, baking soda, and salt.
5. Add to dry ingredients to creamed mixture and mix just until blended. Do not overbeat.
6. Add water and vanilla and blend.
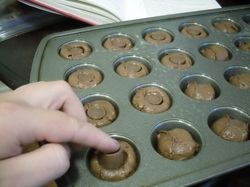
7. Use a 1oz scoop (or just a spoon) to drop batter into each mini muffin cup.
8. Unwrap rolo candies and push one into the middle of each cookie. Don't push it all the way to the bottom of the batter.
9. Bake for 10-12 minutes, rotating the pan halfway through the bake time.
10. Let them cool in the pan for a couple minutes before popping them out.
Now, after trying this the 'cookie' seems more like a brownie.. which is still ok with me! However now I need a big glass of milk.. lol. Give it a try guys! This is an excellent, easy recipe to try with the kids! Don't forget to check out (and 'like')my new facebook page to keep up with new posts and new things coming to Jenni's Baking Blog! Have a question or comment for me? Feel free to message me or leave a comment! I love to hear from you! -Jenni
|
 RSS Feed